Ghee Turmeric Milk Recipe

Home remedies are an effective and natural way to treat mild illnesses like cold, cough and sore throat. One such home remedy is Ghee Turmeric Milk. Prepared using just 4 ingredients- Ghee, Turmeric, Jaggery and Milk, this drink can be prepared in less than 5 minutes. This drink is not only a remedy for cold-cough but can also benefit you in a number of other ways. Ghee Turmeric Milk can reduce joint pain, strengthen the digestive system, reduce stress levels and even provide a natural glow to the skin. All these benefits are backed by Ayurveda which adds credibility to the effectiveness of the drink. It is best to consume this combination at night time, before going to bed. To increase the medicinal power of the drink, you can add a pinch of cinnamon powder, nutmeg powder or even black pepper powder to it. Do try this recipe, rate it and let us know how it turned out to be by leaving a comment in the section below. Happy Cooking!

How to make Ghee Turmeric Milk

  • Step 1 Heat ghee

    Add ghee to a pan and let it heat well. Keep the flame low to prevent the ghee from burning.

  • Step 2 Add milk

    Add milk to the hot ghee and mix continuously. Keep the flame medium and bring the milk to a boil.

  • Step 3 Add turmeric

    Add a pinch of turmeric to the pan. Don’t add more than a pinch of turmeric, as it might make the milk a bit bitter. Whisk well and let the milk simmer for a minute.

  • Step 4 Mix in jaggery

    Now switch off the flame and add powdered jaggery to the milk. Mix until the jaggery combines with the milk.

  • Step 5 Ready to be served

    Pour the Ghee Turmeric Milk into a glass and consume while warm.

Creamy Mango Chia Pudding Recipe

Yearning for a delightful and refreshing sweet treat? Then try this easy peasy sweet treat prepared with the goodness of mangoes, coconut milk and protein-rich chia seeds. This healthy and tasty recipe can be prepared in just a few minutes that too without putting in much efforts, just combine, refrigerate and dig in! So, follow us through some simple steps and enjoy!

How to make Creamy Mango Chia Pudding

  • Step 1 Step 1

    To begin with this easy delicacy, wash and peel the mangoes. Then cut them into small chunks and make a smooth puree.

  • Step 2 Step 2

    Take a bowl and mix chia seeds with warm coconut milk, honey and a dash of cinnamon. Toss it well and soak overnight.

  • Step 3 Step 3

    Take it out in the morning and assemble the dish by pouring the fresh mango puree and topping it up with chilled coconut chia pudding and fresh mango chunks followed by almonds, repeat the layers and refrigerate for an hour to enjoy.

Lemongrass Masala Chai Recipe
Yearning for a piping hot cup of Masala chai? Then give your desi chai an exotic touch with this delightful and aromatic Lemongrass Masala Chai. To make this delicious Lemongrass Masala Chai at home, you just need a few ingredients in place and enjoy this amazing tea. Just follow some simple steps and nail this easy Masala Chai.

How to make Lemongrass Masala Chai

  • Step 1 Boil water

    To make this quick aromatic tea, take a vessel and water, allow the water to boil and add the washed lemongrass stalks, cardamom, star anise, cloves, cinnamon stick. Cover with a lid and let it simmer

  • Step 2 Allow the tea to absorb the flavours

    Next, add in the tea leaves along with sugar. Once done just turn off the flame and let the spices and herbs absorb the flavours.

  • Step 3 Add milk and enjoy

    Add milk to the blend and stir it nicely. Boil the blend for 5 minutes and turn off the flame. Strain the tea and serve with your fabourite snacks.

Mango Spinach Rice Rolls Recipe

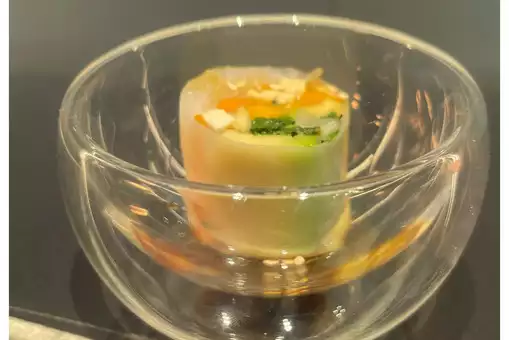
Craving for a delicious and light meal? Then try these sumptuous Mango Spinach Rice Rolls at the comfort of your home and enjoy. This simple yet healthy mix is a mélange of flavours tucked in a rice sheet wrap and served with light soy and sesame seeds dressing. If you are someone who loves the mélange of sweet and tangy flavours, then this avocado and mango dish is perfect to please the palate with a amalgamation of flavours. So, try it today and enjoy this exotic deligh

For Dressing

How to make Mango Spinach Rice Rolls

  • Step 1 Dip the rice sheets in water

    To make this easy recipe, dab the rice sheets in water and remove the excess water using a kitchen towel. Then place it on a kitchen tray.

  • Step 2 Fill in the stuffing

    Next, add some boiled sticky rice in the on the whole rice sheet, place the spinach followed by tofu, mangoes and avocados.

  • Step 3 Roll and enjoy

    Wrap it like a roll and tuck the sides in tightly to close it . Cut it into half or 2inch pieces. Lastly, enjoy with soy and sesame dressing.

Veg Pot Pie Recipe

This Veg Pot Pie is the ultimate comfort food that offers you the goodness of veggies in a unique fashion. Delicious veggies packed in the soft wheat shell is all you need to get rid of a grumpy mood. You can pair it up with ketchup, mayonnaise or any other sauce to spruce things up. The best thing about this recipe is that you can make it with ingredients that are easily available at home. Add all your favourite veggies and you have a yummilicious recipe with you. This interesting recipe can also be easily given to children who usually fuss about eating veggies normally. You can have this Veg Pot Pie either for lunch or for dinner. Do try this recipe, rate it and let us know how it turned out to be.

How to make Veg Pot Pie

  • Step 1 Saute the veggies

    Heat butter in a pot, add chopped garlic, onion and 2 tbsp refined flour. Mix well. Now add chopped carrots, corn and mushrooms. Saute for a few minutes. Add salt and black pepper as per taste. Pour veg stock in the pan and mix well.

  • Step 2 Prepare the filling for the pie

    Add 1/4 cup peas and 1/4 cup fresh cream. Cook till the sauce thickens.

  • Step 3 Roll out the dough

    Now take readymade pastry dough and divide it into two balls. Roll them out into two thin sheets.

  • Step 4 Pie preparation

    Grease a small serving pot with butter and place the rolled out sheet in it. Tap with hands and line the walls of the pot properly with the sheet and leave the excess hanging on the sides. Now fill the prepared mixture in the pot. Apple some water on the edges of the sheet and place the second sheet on top. Stick it properly and cut off excess dough sides. Your pot should be completely sealed with the dough.

  • Step 5 Bake

    Make a small cut on the top sheet and bake at 180 degrees Celcius for 20 minutes.

  • Step 6 Ready to be served

    Now invert the pot onto a place to remove the baked pie. Cut into pieces and enjoy the veggie overloaded delight.

Tandoori Roti Recipe

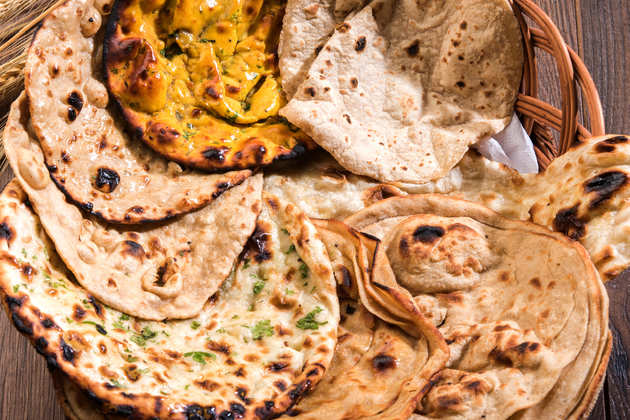
Tandoori Rotis were one of the first kinds of bread to be made in an earthen oven that we now know as tandoor. From parathas to rotis to chicken, Tandoor has been one of the most efficient ovens that India has had for a long time now. Although this technique was first used majorly in Punjab before the partition of India and Pakistan and it significantly spread in other parts of the country after the partition. Tandoori roti in itself is a great example of how cooking anything with the right heat temperature can make so much difference! These rotis are soft on the inside and have a light, crisp crust on the outside. This is one of the easiest ways of making the best Tandoori Rotis that you get to eat in the Punjab region of the country and once you learn to make it, there will be no looking back. To begin, follow this step by step recipe below!

How to make Tandoori Roti

  • New Project - 2020-05-03T174849.947

    Step 1 Knead a semi-stiff dough

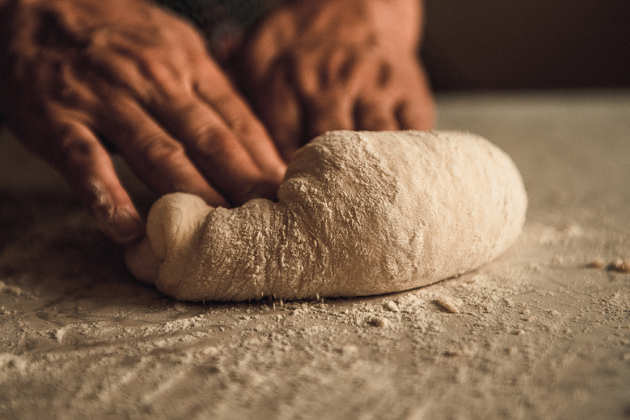
    First, we need to knead a smooth and semi-stiff dough. Take the flour in a bowl and add salt, maida, yoghurt and start kneading. Add little water wherever necessary and keep kneading until everything comes together. Cover this dough with a damp cloth and keep it aside to rest for 30 minutes to 2 hours before cooking. More rest means better results.

    • Step 2 Prepare the dough balls

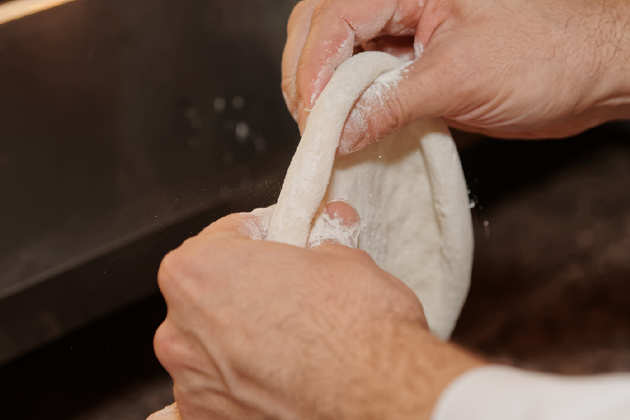
      Start preparing the dough balls. These will be ½ inch larger than regular rotis or big enough to cover the centre of your palm completely. Wet your hands and start spreading the ball on your hands by pressing it. It is important for your hands to be wet at this point.

    • New Project - 2020-05-05T001359.150

      Step 2 Prepare the dough balls

      Start preparing the dough balls. These will be ½ inch larger than regular rotis or big enough to cover the centre of your palm completely. Wet your hands and start spreading the ball on your hands by pressing it. It is important for your hands to be wet at this point.

    • tandoori roti 2

      Step 3 Cook and serve!

      If you have a tandoor, you can place this roti in the hot tandoor carefully. Stick it on the walls. If you don’t have a tandoor handy, heat a tawa and carefully place the roti on it. It will stick to it instantly because of the water and will start blooming up. Pick the tawa and turn the upper side of the roti towards the flame directly. Monitor it properly. The back of the roti will come off as and when it is done. Apply ghee and serve with a delicious chicken or paneer curry!

Sesame Prawns Recipe

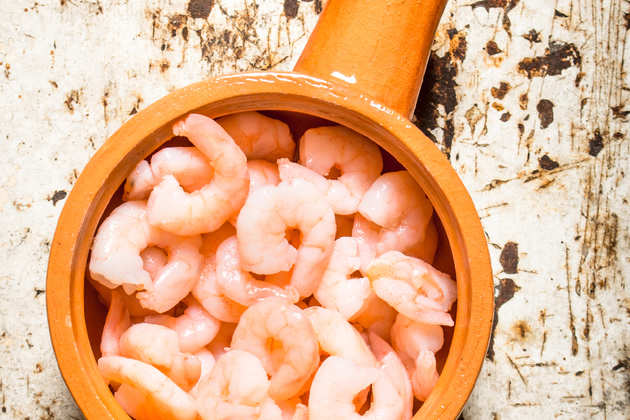
Sesame prawns is a delicious dish with tender flesh and a burst of flavours in every bite. This recipe is easy to make and takes only minutes to prepare. To make this dish, you only require a few simple ingredients. If you love prawns, it is a quick and easy meal that you can make again and again. The recipe gets its tempting flavours from soy sauce, rice wine vinegar and olive oil. It has a sweet and tangy flavour that can be paired with fried rice or steamed sticky rice. The sesame sauce that is prepared in this recipe is a traditional Asian recipe that is used to prepare many dishes. If you are in a mood to eat some delicious seafood, prepare this recipe in just half an hour and enjoy with your loved ones. Rather than making an elaborate meal, make this easy prawns recipe and indulge in a fulfilling meal.

How to make Sesame Prawns

  • 1

    Step 1 Marinate the prawns

    In a large bowl add prawns(peeled and de-veined), soy sauce, garlic, brown sugar, white wine vinegar, and 1 Tablespoon olive oil. Mix well until prawns are coated evenly. Cover and refrigerate for at least 30 minutes.

  • Step 2 Cook the prawns

    Take a medium-sized skillet and heat 1 tablespoon olive oil over medium-high flame. Remove the prawns with a slotted spoon and add to the skillet. Cook for 2-3 minutes until prawns are pink. Then, remove the prawns and set aside on a plate.

    • 2

      Step 2 Cook the prawns

      Take a medium-sized skillet and heat 1 tablespoon olive oil over medium-high flame. Remove the prawns with a slotted spoon and add to the skillet. Cook for 2-3 minutes until prawns are pink. Then, remove the prawns and set aside on a plate.

    • 3

      Step 3 Make the sauce and add prawns to it

      Pour the marinade into the skillet and let it simmer until it becomes thick. Then, add the prawns back to the skillet and add in the sauce. Mix well and cook for a minute. Garnish with chopped green onions and sesame seeds if desired and serve over rice.

Makhana Chaat Recipe

Looking for a healthy, easy and fiber-rich desi snack recipe? Then try this easy Makhana Chaat, which can be made with just a few kitchen ingredients. This simple chaat recipe is great for days when you are following a sattvik diet. In fact, if you are fasting, then this chaat can make for a quick and delicious snack. Packed with the goodness of fiber and minerals, makhana makes for a satisfying treat. This healthy snack recipe can be tweaked as per your taste preference. So, try it today and share your feedback with us in the below given comment

How to make Makhana Chaat

  • Step 1 Roast lotus seeds in ghee

    To begin with this easy recipe, heat a pan and add ghee. Once the ghee is hot enough and add the lotus seeds (Makhana). Toss them well till they turn brownish in colour.

  • Step 2 Wash and clean the veggies

    In the meantime, take all the veggies and wash them well. Cut and chop them well. Assemble all the ingredients in a bowl.

  • Step 3 Whisk the lemon juice

    Next, take a bowl and add lemon juice, red chili, sendha namak and rest of the ingredients. Mix everything well and add the tossed makhana along with fresh coriander leaves, green chilies and season with salt. Garnish with peanuts and enjoy.

Cheese Rice Cutlet Recipe
Have leftover rice from lunch and don’t want to have them for dinner? Then try this super easy recipe and transform the basic rice into something tastier. You just need a handful of ingredients to make these yummy cutlets that can be paired with tomato ketchup, mint chutney and even mayonnaise. Be it kids or adults, everyone will love this dish for sure. You can serve these Cheese Rice Cutlets during kitty parties, birthdays or even a family gathering. To make the Cheese Rice Cutlets more nutritious, you can add grated carrot and even finely chopped capsicum. We have used cheese cubes here to fill the centre with cheese, but you can use any variety of your choice like mozzarella cheese, cheese slice etc. This recipe will come in handy when you don’t want to cook something heavy for dinner. To make the meal wholesome, you can serve tea, coffee or even a soft drink with these lip-smacking Cheese Rice Cutlets. Do try this recipe, rate it and let us know how it turned out to be by leaving a comment in the section below.

How to make Cheese Rice Cutlet

  • Step 1 Saute the onions

    Heat 1 tbsp oil in a pan. Now add chopped onions to it and fry them for a minute. Now add garlic paste, give a mix and cook until the onions turn translucent in colour.

  • Step 2 Make the veggie mixture

    Now add boiled and mashed sweet corn to the pan. Also add red chilli powder, turmeric, coriander powder and salt as per taste. Mix and cook for a few minutes.

  • Step 3 Make tikki mixture

    Now take the leftover boiled rice in a bowl and mash them well. Add the veggies mixture to the bowl, along with 2 tbsp roasted sooji. Mix very well to make a thick mixture.

  • Step 4 Prepare the cutlets

    Now make small tikkis from the mixture, stuff a small piece of cheese in between and set them on a plate.

  • Step 5 Shallow fry them

    Heat 1 tbsp oil in a pan. Shallow fry the tikkis from both sides until golden brown in colour.

  • Step 6 Ready to be served

    Once cooked, your tikkis are ready to be served. Pair up with tomato ketchup and mint chutney. Enjoy!

Panta Bhaat Recipe

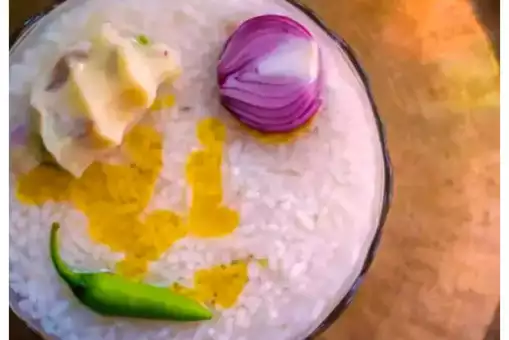
This traditional recipe hails from the Eastern part of the country, especially Odisha and Bengal, where this fermented rice is consumed to heal the digestive ailments and calm the system. This simple delicacy is nothing but leftover rice soaked in water overnight with a dash of salt. This rice is consumed the next day with Aloo Pitika/ Aloo Chokha, Mustard oil, chopped onions, lemon slices and green chilies along with salt. This meal is also good for inducing sleep and treating stomach issues. So, try it today and share your feedback with us in the below given comment section.jmn

How to make Panta Bhaat

  • Step 1 Soak leftover rice

    To begin with this easy recipe, soak leftover rice in water and refrigerate it overnight.

  • Step 2 Wash and peel the veggies

    Next, to prepare the meal, wash and peel the potatoes and onions. Keep some onions for garnishing.

  • Step 3 Pressure cook the potatoes

    Next, take a pressure cooker and add water along with potatoes for 2 whistles. Mash the potatoes.

  • Step 4 Add corinader leaves

    Take a pan and add 2 tbsp mustrad oil and allow it to heat, add red chilies along with chopped onions, green chilies, salt, red chili powder along with mashed potatoes. Cook the Aloo Chowkha and add corinader leaves.

  • Step 5 Assemble and enjoy

    Assemble the dish by serving with hot Aloo Chowkha, onions, mustard oil, salt, lemon pieces. Relish the dish and cold and enjoy.

Crispy Meatballs Recipe

Craving for a delicious crispy meaty snack? Then here is a simple yet amazing meatball recipe, which anyone can make at home. Made with the goodness of boiled chicken, spices and herbs, these crispy homemade meatballs can make for a perfect binge worthy treat you can serve for your parties and get togethers. Just follow this simple recipe given below and enjoy.

How to make Crispy Meatballs

  • Step 1 Boil the chicken

    To make this simple dish, wash, clean and pressure cook the chicken for 2-3 whistles. Once the chicken attains room temperature.

  • Step 2 Make a smooth mixture

    Take a grinder, add the chicken after shredding it using a knife. Make a mixture with green chilies, coriander leaves, lemon juice, ginger, garlic, paprika, salt and pepper. Make a smooth coarse mixture and mix it with corn flour.

  • Step 3 Fry and serve hot

    Make small meatballs. In the meantime, take a pan and add oil. Once the oil is hot enough gently slide the meatballs, shallow fry by tossing the sides. Serve hot with a dip or sauce and enjoy.

Oats Payasam Recipe

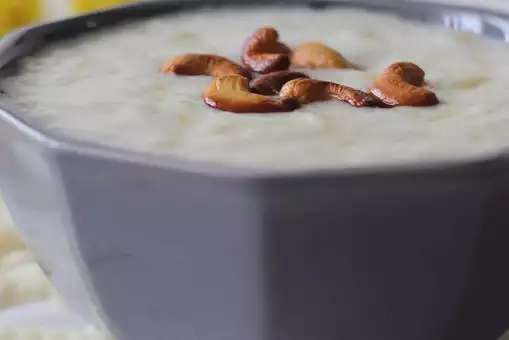
Food plays an intrinsic part in any celebrations. As we celebrate Onam, how about making a fibre-rich payasam that’s delicious and nutritious. The choice is sugar is optional and can be replaced with jaggery or stevia. This Oats Payasam recipe is prepared by roasting oats and cooking them with skimmed milk with a pinch of cardamom powder. If you are also looking for a different Onam recipe this year, try this Oats Payasam and relish the flavours. (Recipe by Pearle Maaney,

How to make Oats Payasam

  • Step 1 Roast cashews

    Roast cashew nuts till golden in a little ghee and set them aside.

  • Step 2 Roast the oats

    To the same pan, add multigrain oats. Toast and roast them till they’re golden. Then pour milk and mix.

  • Step 3 Cook until thick

    Cook until it turns thick. Then add cardamom powder and sugar (optional). Mix until it dissolves.

  • Step 4 Oats Payasam is ready

    Pour a little ghee (optional) and stir. Transfer Oats Payasam in a serving bowl.

  • Step 5 Garnish and serve

    Garnish with Cashew Nuts. Serve hot or warm!

Stuffed Apple Ice Cream Recipe

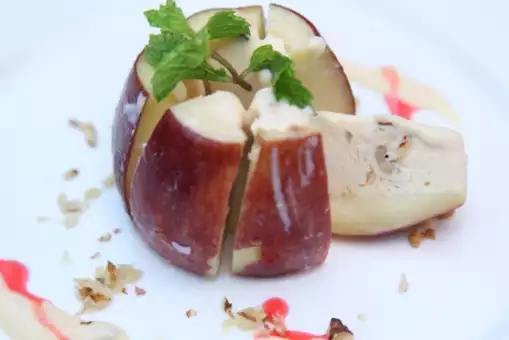
Looking for a unique sweet dish to prepare for the festival of Rakhi? Try this delish Apple Ice Cream recipe that is so easy to make and can be prepared with just a handful of ingredients. This Rakhi impress your brother or sister by making this simple and sweet ice cream for them. You just need an apple, milk, condensed milk, almonds, sugar, cashews and a few mint leaves for garnish. Freezing time is about 5 hours for this ice cream. If you are an ice cream lover, then you need to bookmark this recipe for sure. The mix of the natural flavours of apple with creamy rich ice cream is indeed heavenly. You can also add more nuts of your choice like walnuts, raisins etc to make the ice cream richer. We have used white sugar in this recipe, however, if you usually avoid sugar, then a healthy sweetener like stevia, coconut sugar or honey can be used to sweeten the ice cream. This delicious Apple Ice Cream will add more sweetness to any kind of occasion or celebration. Do try this recipe, rate it and let us know how it turned out to be by leaving a comment in the section below. Happy Cooking!

How to make Stuffed Apple Ice Cream

  • Step 1 Prepare the apple

    Take a fresh apple and make a cut on the top. Now cut around the seed area, take a spoon for twisting the seed and take it out.

  • Step 2 Make ice cream mixture

    To make the ice-cream mixture, boil the milk on medium flame. Let it boil and reduce to 1/3 of milk. Add sugar and let it boil for some time. Now milk will become thick in consistency, add condensed milk, nuts and boil it for another two minutes.

  • Step 3 Let it cool down

    Switch off the flame now. Let the ice cream mixture cool down for a while.

  • Step 4 Stuff and freeze the apple

    Take the ice cream mixture, stuff it into the apple, close on top and freeze it for 5 hours.

  • Step 5 Ready to be served

    Once it sets, take out apple ice-cream and cut it into slices and serve it with mint leaves.

Fish Fingers Recipe

For those who enjoy eating seafood, here is a dish that you can easily make at home in no time. This Fish Fingers recipe is a popular appetizer that has a crunchy texture and a soft inside and is best enjoyed with mayonnaise and tomato ketchup. Here’s how to make Fish Fingers at home.

Perfect for a game night or a kitty party, there is nothing that can go wrong while making this recipe as it’s super easy-to-make and can be prepared at home in just 30-minutes. The best part about this appetizer recipe is that you can use any fish for making this flavourful dish. A coating made of panko breadcrumbs, eggs, all-purpose flour, parmesan cheese and mayonnaise is used to coat the fillets and then baked to perfection. Fish Fingers are best enjoyed with mayonnaise and tartare sauce and can be made on any occasion it will never fail to impress you!

How to make Fish Fingers

  • Step 1 Roast breadcrumbs

    Preheat the oven at 180 degree Celsius. Spread breadcrumbs on a baking tray with cooking oil sprayed on it. Roast them until golden for 3-4 minutes. Transfer these golden breadcrumbs into a bowl and add parmesan cheese, salt and black pepper to taste. Mix well and keep aside.

  • 2

    Step 2 Prepare the batter for coating

    Increase the oven temperature to 220 degrees Celsius. Next, spray another baking tray with cooking oil. Then, take a bowl and mix egg, mayonnaise, all-purpose flour and, salt and pepper to prepare the batter.

  • Step 3 Coat fish in batter and bake

    Cut the fish fillets into strips of 1.5 x 11 cm. Dip the fillets into the batter and pick it up with tongs and toss them in the breadcrumbs to coat properly. Transfer to the greased baking tray and spray with a little refined oil. Place the tray in the preheated pan and bake for 12 minutes or until crispy on the outside.fish fillets

  • Step 4 Serve fish fingers

    Serve the fish fingers with tartare sauce and garnish with lemon wedges and chopped parsley

Chana and Boondi Chaat Recipe

If you are a Chaat lover, then you need to bookmark this recipe right away. The base ingredient of this recipe is Kala Chana, which makes this chaat protein-rich. A perfect mix of health with taste, this Chaat recipe is also apt for those on a diet. Prepared using Kala Chana, Onion, Tomato, Raw Mango, Green Chillies, Boondi and a handful of spices, this yummy chaat recipe can be easily prepared at home. Chaats are all about offering a burst of flavours and so does this one. Be it kids or adults, everyone will love this recipe for sure. The mix of boiled Kala Chana with Boondi is a unique combination in itself and is a must-try for all food enthusiasts. This chaat recipe can be prepared for picnics, potlucks, kitty parties or as an evening snack. Pair up this lip-smacking Chaat with a piping hot cup of chai and enjoy. Do try this recipe, rate it and let us know how it turned out to be by leaving a comment in the section below. Happy Cooking!

How to make Chana and Boondi Chaat

  • Step 1 Saute the ingredients

    Heat oil in a non-stick kadhai, add cumin seeds, chopped green chillies and cook. Also, add boiled kale chane and sauté lightly on low heat.

  • Step 2 Add spices and roast

    Later add coriander powder, red chilli powder, roasted cumin powder, black salt and dried mango powder and sauté on low heat.

  • Step 3 Do the plating

    Chop coriander leaves and add along with salt and mix. Transfer the chane mixture and boondi into a bowl. Sprinkle lemon juice, onion, tomato, raw mango, chaat masala, and garlic and chana and boondi over it.

  • Step 4 Ready to be served

    Your scrumptious Chaat is now ready to be served. Enjoy!

Hariyali Matki Khichdi Recipe

Whenever cooking for a diabetic person, it becomes utmost importance that the food doesn’t have too many carbs as that can shoot the blood sugar, causing restless and other related issues. For all those looking for diabetic-friendly recipes, we have a dish that’s not just nutritious and takes care of the blood sugar, but is delicious in taste too! This khichdi recipe has been made with matki or moth bean sprouts, which is known to be a good source of protein. The moth bean sprouts are super-healthy and loaded with dietary fibre, vitamin B1, and minerals like magnesium, zinc and phosphorus, which are necessary to maintain the complete health of a person. When a diabetic person consumes this khichdi, it helps in controlling the blood sugar levels of a person who has been dealing with it for a long time. This khichdi recipe is super-easy to make and can be prepared in just 15-20 minutes. All you require to cook this dish is soaked moth bean sprouts or matki and rice along with mint leaves, spinach, and a few spices and you are good to

How to make Hariyali Matki Khichdi

  • Step 1 Sak moth beans (matki) and rice

    Take a large bowl and wash moth bean (matki) 2-3 times. Once done, soak them overnight and once soaked, drain well. Next, wash the rice 2-3 times and soak for 20-30 minutes before cooking.

  • Step 2 Temper cumin seeds and asafoetida in ghee

    Now, take a kadhai and put it on medium flame. Put desi ghee in it and let it melt. Once the ghee is melted, add cumin seeds in it along with heeng (asafoetida). Let them temper for a few seconds.

  • Step 3 Sauté onion & garlic

    In the kadhai, add chopped onion and garlic in it. Stir well and sauté them on medium flame.

  • Step 4 Cook soaked rice and moth beans in the kadhai

    Once the raw smell of onion goes away, add soaked matki and rice in it and mix well. Then, add water to the kadhai and stir once again. Cook the khichdi on medium to high flame. Now, add black pepper powder and garam masala to the khichdi and mix once again. Cook for 2-3 minutes.

  • Step 5 Cook the Khichdi with spinach and spring onions

    Finally, add the palak puree to the cooking khichdi along with chopped palak, green chillies and spring onions. Stir well and cook for another 2-3 minutes. Add the chopped mint leaves to the kadhai and mix once again.

  • Step 6 Temper garlic in ghee and add to the Khichdi, and enjoy

    For the final step, put the tadka pan on medium flame and melt ghee in it. Add chopped garlic to it and temper for a few seconds and pour it over the cooking khichdi. The khichdi is done, serve it hot with roasted papad, achar and Rajasthani Kadhi.

Kakori Kebab Zaitooni Recipe

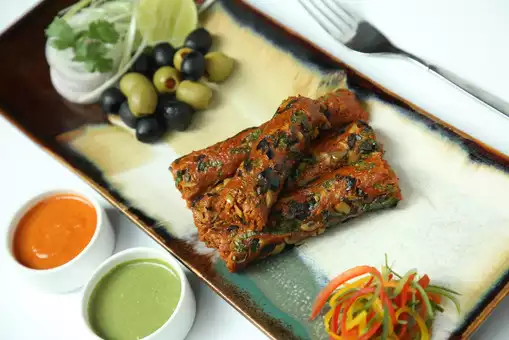
With the chilly winter season here it is the perfect time to indulge in some warming foods like kebabs. Mutton kebabs are a mouth-watering variant of kebabs that you can easily prepare at home by following the below-given recipe. We bring to you an authentic kebab recipe that too by the chef of The Metropolitan Hotel himself. If you are a kebab lover and wish to re-create the restaurant-style experience at home, then this is the perfect recipe for you. Just gather all the ingredients below and get cooking. You can make these kebabs in an oven, grill them over a charcoal grill or even roast them on a non-stick tawa. These melt-in-the-mouth mutton kebabs will surely woo you with their flavours. This Kakori Kebab recipe includes a plethora of spices which are essential to give the kebabs their signature taste. You can make them for a family dinner, an evening party or even for a barbeque party. Do try this recipe, rate it and let us know how it turned out to be.

How to make Kakori Kebab Zaitooni

  • Step 1 Saute the onions

    Heat ghee in a pan. Add sliced onions and saute them until golden-brown in colour and crisp in texture.

  • Step 2 Mix the ingredients

    Now add all the ingredients to a large bowl and mix well to form a mixture or dough. Cover and refrigerate for an hour.

  • Step 3 Cook the kebabs

    About 25 minutes before serving, shape the meat around the skewers and place the kebabs onto a grill over a drip tray or in a pre-heated oven (also on a drip tray). If cooking over a charcoal grill, you will have to keep rotating them so that they are brown and cook evenly. Cook for 15-20 mins at 220 degrees Celsius. Brush with ghee and cook for 2 minutes more.

  • Step 4 Ready to be served

    Once done, garnish with chaat masala onions and lemon and serve with green chutney.

Grapes and Chicken Salad Recipe

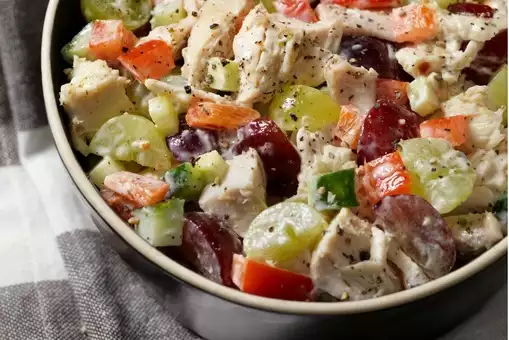
If you are a chicken lover, then you need to try this lip-smacking chicken-based dish for sure. Who said salads have to be boring and bland? This delicious salad recipe will amp up your basic salad and will become one of your favourites. This is a quick meal which you can eat as an appetiser or even as a main dish, if you’re in the mood to eat something light. You can even use this salad to fill your sandwiches or rolls. This chicken dish is a refreshing one that you can make for picnics and birthdays. You can refrigerate this as well in an air tight container and serve it as a side dish whenever you want to. Grape and Chicken salad is best served cold. The grapes add a tinge of sweet flavour to the savoury chicken which gives a very unique overall flavour. You can use any type of grapes available whether they are black, red or green grapes. Be it kids or adults, everyone will love this recipe for sure. Do try this recipe, rate it and let us know how it turned out to be by leaving a comment in the section below. Happy Cooking! (image credits-istock)

How to make Grapes and Chicken Salad

  • Step 1 Prepare the chicken

    Chop the boiled chicken into small pieces or shred them as per your convenience.

  • Step 2 Mix the ingredients

    In a bowl add shredded or chopped chicken, celery, green grapes, black grapes, chopped walnuts, mayonnaise, salt and black pepper powder. Give a good mix.

  • Step 3 Refrigerate and serve

    Refrigerate the salad for 15 minutes and serve cold. Enjoy!

Fire & Ice Recipe

This cocktail is the perfect combination of fire and ice and thus the name. When you combine tennesse whiskey with ginger ale, and give a touch of lemon juice, it provides a hot flavour in your mouth. It’s the perfect drink to have in hot summer, and we advice you add lots of ice cubes in it. To bring a little more flavour to this delicious cocktail, add a bit of lime juice and see the magic. Do try this at home and enjoy with your friends.

How to make Fire & Ice

  • Step 1 Mix all the ingredients in a glass

    Take a rocks glass and add all the ingredients in it.

  • Step 2 Garnish with lemon wedge and serve

    Stir well and garnish with a lemon and/or lime wedge.

Nutella French Toast Recipe

Nutella French Toast makes an ideal addition to school breakfasts/lunches with its irresistible combination of flavours. The creamy Nutella filling sandwiched between slices of golden French toast provides a delicious and satisfying treat that will surely bring joy to students. To prepare this delightful Nutella French Toast, start by whisking together milk, cornstarch, ground flaxseeds, baking powder, and vanilla in a shallow bowl. Melt butter in a pan over medium-high heat and whisk the batter again before dipping each side of the bread into it. Let the bread soak for about 10 seconds, then cook it in the pan for 2-3 minutes on each side until golden brown. Add more butter as needed between bread slices. Serve the scrumptious French Toast with a generous spread of Nutella and fresh fruit. For an extra treat, pair it with a refreshing berry smooth

How to make Nutella French Toast

  • Step 1 Prepare the batter

    In a shallow wide bowl, whisk together the milk, cornstarch, ground flaxseeds, baking powder, and vanilla. Add butter to a pan over medium-high heat and melt. Whisk the batter again right before dipping bread, as the cornstarch will settle to the bottom of the bowl.

  • Step 2 Cook the battered bread

    Dip each side of the bread in the batter and let soak for about 10 seconds, then add the bread to the pan and cook for 2-3 minutes on each side, until golden brown. Add more butter to the pan as needed in between pieces of bread. Serve with Nutella and fresh fruit.