Jackfruit Biryani Recipe

Biryani is one of the most appetizing meals loved by everyone. Kathal biryani, also known as Jackfruit Biryani, is a delicious recipe that you must try this summer. To make a delicious and mouth-watering biryani at home, you don’t always need to have chicken or meat in it. In flu seasons, when it is advised not to eat mutton or chicken, jackfruit can be a great substitute as it tastes just like chicken and has a similar texture like both red meat and chicken. Jackfruit Biryani is a perfect combination of meaty vegetable with long grains and fragrant basmati rice. It gets the delectable flavours with a melange of spices and biryani masala. If you love jackfruit, this is the recipe you must try. It is easy-to-make and you can simply pressure cook this biryani recipe. It takes only 40-minutes to prepare this amazing jackfruit biryani. So, unlike other biryanis, you will not have to wait long to savour it. Make this recipe on special occasions like kitty parties and potlucks, and indulge in a flavoursome meal with your loved ones.

For Garnishing

How to make Jackfruit Biryani

  • Step 1 Saute onions with whole spices

    To prepare the delicious jackfruit biryani, place a large pressure cooker on medium flame. Heat 4 tbsp oil and add bay leaf and whole black pepper. Add thinly chopped onion and saute for a minute.

  • Step 2 Add spices and saute until onions are golden brown in colour

    Now, add ginger-garlic paste and saute till onions are golden brown. Add red chilli powder, salt as per taste, and mix well.

  • Step 3 Fry jackfruit in the cooker for 2-3 minutes

    Put jackfruit in the pressure cooker and saute for a minute. Cover lightly and cook for 3 minutes. Stir occasionally.

  • Step 4 Cook jackruit with all the spices and yoghurt

    Add biryani masala, garam masala, turmeric, yoghurt to the cooker and mix well. Cover and let it cook for another 3 minutes. This will help jackfruit to absorb all the flavours and soften.

  • Step 5 Pressure cook the jackfruit with rice

    Now, add the rice, stir to mix well and cook for 3 minutes. Add water and close the lid. Pressure cook on high till 3-4 whistles. Turn off the flame and let the pressure cooker cool.

  • Step 6 Once done, garnish as you like and serve hot

    Open the lid of the pressure cooker once it is at normal temperature and all the steam is out. Take out the kathal biryani and let it cool. Plate the biryani, and garnish with cashews, chopped cilantro and mint leaves. Serve hot with raita and green chutney.


Ricotta and Spinach Ravioli in Tomato Sauce Recipe

Craving for a delicious Italian meal for your special Sunday brunch? Then try this delicious Ricotta and Spinach Ravioli in Tomato Sauce. Tender, beautiful, homemade pasta , stuffed with a creamy mixture of ricotta, spinach, and nutmeg. Served with a simple basil tomato sauce and topped with grated Parmigiano, these ravioli will revive Italian vibes with just one bite. Making this dish at home from scratch ensures that the ingredients are fresh and adulterant free. So, try this classic: Ravioli Ricotta e Spinaci, Ricotta and Spinach Ravioli in Tomato Sauce and enjoy it with your family and friends.

For Filling

For Dough

For Garnishing

For The Main Dish

How to make Ricotta and Spinach Ravioli in Tomato Sauce

  • Step 1 Homemade Pasta Dough

    Making homemade pasta dough is pretty easy and it’s the same for many different pasta shapes. The rule is 1 egg to 100 grams of flour, and that makes enough pasta for 2 people. In this recipe we have used 2 large eggs and 200 grams of flour type 00. While kneading we can add a few drops of water if the dough seems too dry.

  • Step 2 Mix the egg and flour gradually

    On the wooden board, spread the flour, make a hole in the center and add the eggs. Beat the eggs with a fork and start incorporating a little flour. Keep beating the eggs incorporating more of the inner edge of the flour ‘wall’ until the flour starts absorbing the eggs.Once the eggs are blended in the flour, and you have somewhat of a raggedy dough, start working it. Work the dough with your fingertips first to release some moisture. Add a few drops of water if necessary.

  • Step 3 Knead the dough

    Knead vigorously for a few minutes using your whole hand, folding and turning. As soon as the dough is smooth, shape it into a ball, cover it with a cloth or a bowl, or wrap it in plastic, and let it rest for 30 minutes. The gluten will relax and you will have a more elastic dough. While the dough is resting, prepare the filling.

  • Step 4 Make the stuffing

    In a bowl add the ricotta, Parmigiano, and the chopped boiled spinach. TIP: Squeeze the spinach very well before chopping it and adding it to the ricotta. Adjust with salt and grated nutmeg. Mix everything until creamy smooth, taste for seasoning, and set aside.

  • Step 5 Make the pasta

    After the resting time, divide the dough into four parts. Take a piece of dough, and leave the others covered so they do not dry out. Lightly flatten the piece of dough with your hands, pressing it on the floured work surface. Then, turning the handle of the pasta machine, start rolling it, going from the lowest number on the wheel (1) that is the widest roller thickness of the pasta machine, gradually going up one number, until you have a rather thin pasta sheet (5). Pass the sheet a couple of times through the rollers at each number. Since ravioli are made with two overlapping pasta sheets, it is better to have a thin dough.

  • Step 6 Cut the pasta sheet

    When the pasta sheet is at the desired thickness, cut it in half using a knife. On one half add a heaping teaspoon of filling, leaving a space of about 2 fingers in between. Cover with the other half sheet and with your fingers press the dough around the filling to remove as much air as possible. As soon as you have the finished ravioli, it is important to lay them on a large baking sheet with parchment or wax paper, well-floured, so they won’t stick at the bottom. A wood surface dusted with flour to lay your ravioli works great. Let the ravioli dry a little and, if you haven’t made your sauce yet, it’s time to make a simple basil tomato sauce.

  • Step 7 Tomato sauce

    Take a pan and add oil, once the oil is hot enough add minced garlic clove, onion, tomato puree, carrot cook the sauces, add salt and pepper to taste. Lastly add basil leaves and cheese.

  • Step 8 Making the meal

    In a large pot of salted boiling water, place ravioli in delicately. Wait till the ravioli come to the surface, then cook for about 2 minutes longer, about 6-7 minutes total. Take out of water using a slotted spoon and place in a big bowl with some tomato sauce at the bottom. Add more sauce on top, stir gently, then add abundant grated Parmigiano. Place 5-6 ravioli onto a plate and dress with some more sauce and Parmigiano. Ready to serve!

Kakori Kebab Zaitooni Recipe

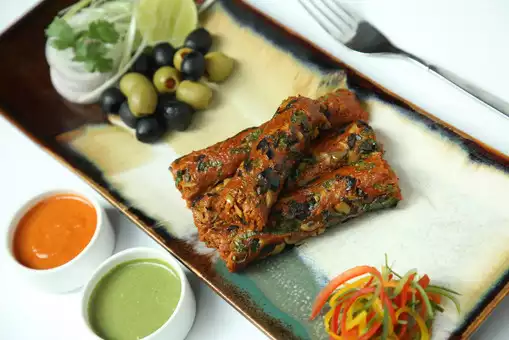
With the chilly winter season here it is the perfect time to indulge in some warming foods like kebabs. Mutton kebabs are a mouth-watering variant of kebabs that you can easily prepare at home by following the below-given recipe. We bring to you an authentic kebab recipe that too by the chef of The Metropolitan Hotel himself. If you are a kebab lover and wish to re-create the restaurant-style experience at home, then this is the perfect recipe for you. Just gather all the ingredients below and get cooking. You can make these kebabs in an oven, grill them over a charcoal grill or even roast them on a non-stick tawa. These melt-in-the-mouth mutton kebabs will surely woo you with their flavours. This Kakori Kebab recipe includes a plethora of spices which are essential to give the kebabs their signature taste. You can make them for a family dinner, an evening party or even for a barbeque party. Do try this recipe, rate it and let us know how it turned out to be.

How to make Kakori Kebab Zaitooni

  • Step 1 Saute the onions

    Heat ghee in a pan. Add sliced onions and saute them until golden-brown in colour and crisp in texture.

  • Step 2 Mix the ingredients

    Now add all the ingredients to a large bowl and mix well to form a mixture or dough. Cover and refrigerate for an hour.

  • Step 3 Cook the kebabs

    About 25 minutes before serving, shape the meat around the skewers and place the kebabs onto a grill over a drip tray or in a pre-heated oven (also on a drip tray). If cooking over a charcoal grill, you will have to keep rotating them so that they are brown and cook evenly. Cook for 15-20 mins at 220 degrees Celsius. Brush with ghee and cook for 2 minutes more.

  • Step 4 Ready to be served

    Once done, garnish with chaat masala onions and lemon and serve with green chutney.

5-Minute Mug Brownie Recipe

Craving for a chocolaty dessert but don’t want to spend hours in the kitchen making one? Here is a super easy 5-minute brownie recipe that you can literally make in a jiffy. You just need a handful of ingredients from the kitchen to make this sinful chocolate brownie. This is a veg brownie recipe and doesn’t even require eggs. To give the brownie a better texture, we have added some chocolate chunks which will make the melted chocolate ooze out, making it almost a choco lava cake. You can increase or decrease the quantity of ingredients in the same ratio, depending on the number of people for whom you are making the cake. Make sure you use a big mug that is microwavable because the batter might rise a bit while baking it and you don’t want the cake to ooze out of the mug. You can make this quick brownie for a low-key birthday, anniversary or even to make your loved one feel special. We haven’t use anything to garnish the cake, but you can definitely decorate it using chocolate syrup, chocolate ganache, chocolate chips, sprinkles, nuts, candied fruits etc. Do try this recipe, rate it and let us know how it turned out to be by leaving a comment in the section below.

How to make 5-Minute Mug Brownie

  • Step 1 Sift the dry ingredients

    Take a large microwavable mug. Through a sieve, sift the dry ingredients like all-purpose flour, powdered sugar, cocoa powder and baking powder.

  • Step 2 Mix in the wet ingredients

    Now add milk and vegetable oil to the cup. Use a fork or a spoon to give a good mix. Now dunk the chocolate pieces into the mug and cover them using the batter.

  • Step 3 Microwave it

    Now microwave the mug for about 3 minutes. Check by inserting a toothpick. If it comes out clean, your brownie is done. If not, then microwave for 1-2 minute more, as per the need.

  • Step 4 Garnish and serve

    Garnish with chocolate sauce (optional) and serve.

Creamy Corn Chaat Recipe

This Holi impress your family and guests with this creamy and yummy Corn Chaat. With just a handful of ingredients, you can make a scrumptious chaat for yourself.

Corn Chaat is a common snack that is loved by people of all ages, be it kids or adults. If you often avoid fried and oily snacks, then this Corn Chaat is perfect for you. Loaded with veggies like bell peppers, zucchini, cherry tomatoes and corn, this recipe will be an instant hit. Adding sev as a garnish will add a much-needed crunchy texture to it. Make sure you don’t skip adding garlic mayonnaise to the chaat, as this adds a nice aroma and flavour to the dish. We have added salt, red chilli powder and chilli flakes as seasonings, but you can also add peri-peri and oregano to the dish. This creamy Corn Chaat can also be served with tea or coffee. Kitty parties, picnics or any other ocsssion or gathering is apt for this snack to be served. Do try this recipe, rate it and let us know how it turned out to be by leaving a comment in the section below. Happy Cooking!

How to make Creamy Corn Chaat

  • Step 1 Saute the veggies

    Heat butter in a pan. Add chopped zucchini and red bell pepper. Saute for 1 min on medium flame. Now add corn and roast for another minute.

  • Step 2 Add the seasonings

    Now add red chilli powder, chilli flakes and salt as per taste. Give a good mix.

  • Step 3 Garnish and serve

    Take out the mixture in a bowl. Garnish with cherry tomatoes, lemon, coriander leaves, sev and garlic mayo. Give a toss and serve.

Badam Paneer Ka Kashmiri Shufta Recipe

Bored of the usual mithais, sweets or desserts? Try this off-beat Badam Paneer Ka Kashmiri Shufta that will woo you with its tempting flavours and aroma.

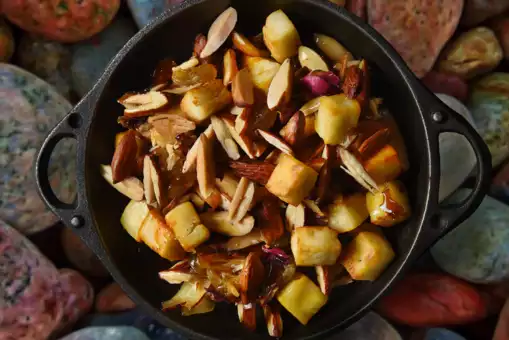
Badam Paneer Ka Kashmiri Shufta is the perfect fusion of traditional flavours with a modern twist. Be it a festival or any other special occasion, this Badam Paneer Ka Kashmiri Shufta is the perfect dessert to serve to your guests and impress everyone with your culinary skills. When it comes to nuts, almonds are one of the tastiest and healthiest of the lot. If almonds are your favourite as well, then bookmark this recipe and try it out at home. For the upcoming Valentine’s Day, this Kashmiri Shufta is perfect. You can also try it out for birthdays, anniversaries, pot lucks, buffets or any other party. Loaded with rich ingredients like almonds, dates, raisins and ghee, this dessert will also keep you warm during chilly winter months. Do try this recipe, rate it and let us know how it turned out to be by leaving a comment in the section below. Happy Cooking!

How to make Badam Paneer Ka Kashmiri Shufta

  • Step 1 Chop the dates

    Cut the dates into small pieces and soak in water for 15 minutes or till soft.

  • Step 2 Soak the raisins

    Wash and soak the raisins in a separate bowl for 15 minutes.

  • Step 3 Fry the ingredients

    Heat desi ghee and fry the almonds, paneer and coconut flakes till golden in colour.

  • Step 4 Prepare syrup

    In a pan, take water and add sugar, spice powder, saffron and rose petals. Cook till you reach a syrupy stage.

  • Step 5 Mix all the ingredients together

    Add fried almonds, paneer, soaked dates and raisins. Mix it thoroughly and till sugar syrup is reduced to a coating consistency.

  • Step 6 Ready to be served

    Take out the dish in a serving bowl and serve. Enjoy while warm

Hot Toddy Recipe

As far as easy cocktails go, there’s nothing quite as cosy and comforting as a hot toddy on a cold winter night. Sure, you could opt for mulled cider or winter sangria, but both drinks require some foresight, requiring either an hour to simmer or even more time to hang in the fridge overnight. This toddy, on the other hand, comes together in mere minutes. Plus, it’s lighter and less sweet. To make a classic hot toddy, you’ll need hot water, whisky (or bourbon), honey, and lemon. A cinnamon stick adds a touch of warmth but is optional. To give the elixir a spicier edge, feel free to play around with ingredients. You can add spices of your choice to increase the flavour of this drink. Also, if you like, add maple syrup to the Hot Toddy for more taste & flavour.

How to make Hot Toddy

  • Step 1 Mix rum with brandy and hot water

    Take a glass and add brandy in it along with rum and hot water. Stir once.

  • Step 2 Add spices and enjoy

    Next, add star anise in it along with a cinnamon stick to bring that flavour. Enjoy this hot drink.

Banana Walnut Pancake with Fruit Medley Recipe

Gearing up to host a romantic meal for your loved one but don’t know what to prepare? Fret not, as here is a delicious Pancake recipe to drive your worries away! Loaded with the goodness of health and irresistible flavours, Banana Walnut Pancake is served with a flavourful medley of fruits. This recipe also contains walnuts, which are the go-to nut for anything sweet or savoury. Walnuts are also an excellent source of plant-based omega-3, antioxidants and fibre, they make every dish an instant favourite. Banana Walnut Pancake is an ultimate comfort food that you can make for breakfast or even as a snack. So what are you waiting for? Put on your apron and add the magic of love and nutrition to your Valentine’s meal. Do try this recipe, rate it and let us know how it turned out to be by leaving a comment in the section below.!

How to make Banana Walnut Pancake with Fruit Medley

  • Step 1 Chop the fruits

    Peel the mango and then slice the fruit into chunks. Also cut the strawberries and blueberries into pieces. Mix all the fruits well and set aside.

  • Step 2 Mix the dry ingredients

    In a bowl, mix together flour, sugar, baking powder and salt.

  • Step 3 Make the batter

    In another bowl, mash the banana well and mix in milk, egg and chopped walnuts. Now add the dry ingredients mixture to this mixture and mix well. If the mixture seems too thick, add little bit of milk.

  • Step 4 Make pancakes

    Heat griddle or skillet, preferably nonstick, until medium hot. Brush it properly with oil. Pour the batter on the pan, using 1/4 cup per pancake. Cook the pancake for about 2 minutes, then flip it and cook up to 1 minute or until golden in colour. Make more such pancakes with the leftover batter.

  • Step 5 Ready to be served

    Serve the pancakes with the prepared fruit medley and drizzle them with maple syrup or honey, if desired.

Pearl Millet & Amaranth Banana Sweet Tea Bread Recipe

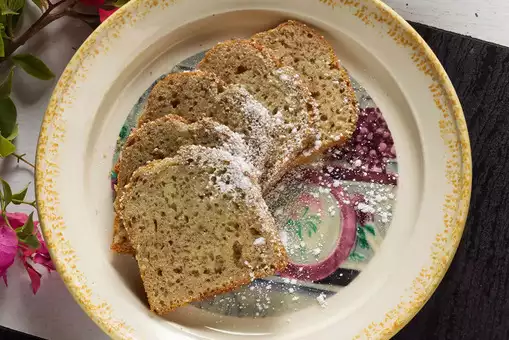
Pearl millet and amaranth banana sweet tea bread is a nutritious and delicious baked good that combines the goodness of two gluten-free grains – bajra (pearl millet) and rajgira (amaranth) with the natural sweetness of bananas. Both bajra and rajgira are high in fibre, protein, and various essential nutrients, making them a great addition to a regular diet. To make the bread, bajra and rajgira flour are mixed with baking powder, baking soda, cinnamon, and salt. Ripe bananas, eggs, oil, and honey are blended together in a separate bowl and then added to the dry ingredients. The batter is then poured into a loaf pan and baked in the oven until golden brown. The result is a delicious and moist bread that is perfect for breakfast, snack, or dessert. The natural sweetness of the bananas and the nutty flavour of the millet and amaranth flour make this bread a nutritious and tasty alternative to traditional baked goods made with refined flour and sugar. Plus, it’s easy to make and can be stored in the fridge or freezer for later enjoyment.

How to make Pearl Millet & Amaranth Banana Sweet Tea Bread

  • Step 1 Preheat the oven

    Preheat the oven to 180 degrees C. Next, grease and flour two 8×4-inch loaf pans and set aside.

  • Step 2 Whisk together eggs, sugar and oil

    In a medium bowl, whisk together butter, oil, sugar, jaggery, and eggs until thoroughly incorporated. Add in the vanilla, yoghurt and bananas. Set aside.

  • Step 3 Mix all the dry ingredients

    In a large bowl, whisk together flour, salt, baking soda and cinnamon. Stir in the amaranth & bajra flour.

  • Step 4 Mix the liquid and dry ingredients

    Make a well in the centre of the dry ingredients. Add the wet ingredients into the well and use a spatula to fold the batter in.

  • Step 5 Bake the cakes

    Divide the batter between the two baking pans. Sprinkle with some puffed amaranth on top and bake for 50-60 minutes, or until a toothpick inserted in the centre of the loaf comes out clean.

  • Step 6 Cool the cakes for 15 minutes

    Remove the pans from the oven and cool for 15 minutes before inverting onto a wire rack to cool further and serve.

Avocado Cheese Sandwich Recipe

Looking for a fresh sandwich with a twist of taste and health? Then try this amazing sandwich, which can be made in just a few minutes. You can also use normal brown bread, but in this recipe we have used croissant. To enjoy this delicious sandwich, all you need is some mashed avocado, spinach leaves, croissant, zucchini, cottage cheese and some butter. Lastly, spices add a pinch of taste. This sandwich recipe is perfect for road trips or as a delicious mini snack for evening cravings. So, try it today and enjoy!

How to make Avocado Cheese Sandwich

  • Step 1 Spread butter

    To begin with this recipe, cut the croissant into equal halves and spread butter.

  • Step 2 Make avocado mash

    Take the avocado flesh and mash it with salt, black pepper and red chili flakes. Mix it well.

  • Step 3 Assemble the ingredients

    Spread this avocado mix on both parts. Wash and place the zucchini slices and spinach leaves. In the meantime, grill a cottage cheese steak with salt and pepper.

  • Step 4 Bake the sandwich

    Lastly, add more layers, season the sandwich as per taste. Bake for 5 minutes and enjoy!

Cloud Omelette Recipe
Craving a fluffy and soft omelette? Try this Japanese version of omelette which has a melt-in-the-mouth texture. Also called souffle omelette, this cloud omelette recipe is super easy to make. All you need for this is eggs, salt and black pepper. The trick of making the omelette lies in its preparation and cooking technique. In order to make it more nutritious, you can stuff some sauteed veggies in it, once the omelette is cooked. Do try this Cloud Omelette recipe, rate it and let us know how it turned out to be.

How to make Cloud Omelette

  • Step 1 Separate egg whites and yolk

    Take two different bowls. Crack open the eggs and add egg yolks in one bowl and the egg whites in another.

  • Step 2 Whisk well

    Use an electric whisker and whisk the egg whites until foamy. Now add 2 tbsp water to the egg yolks and whisk them as well. Once done, make sure both your batters are creamy and foamy. Add salt and pepper as per taste in both mixtures.

  • Step 3 Cook it

    Now add oil to a non-stick pan and pour the egg yolk mixture into it. Spread it a bit to make a circular shape. Cover with a lid and let it cook for a while. After 3-4 minutes, open the lid and pour the egg whites mixture on the prepared omelette and spread it well. Cover the lid again and let it cook for 3-4 minutes more.

  • Step 4 Ready to be served

    Once cooked, transfer to a plate and fold it in half. Your Cloud Omelette is ready to be served.

5-Minute Mug Brownie Recipe

Craving for a chocolaty dessert but don’t want to spend hours in the kitchen making one? Here is a super easy 5-minute brownie recipe that you can literally make in a jiffy. You just need a handful of ingredients from the kitchen to make this sinful chocolate brownie. This is a veg brownie recipe and doesn’t even require eggs. To give the brownie a better texture, we have added some chocolate chunks which will make the melted chocolate ooze out, making it almost a choco lava cake. You can increase or decrease the quantity of ingredients in the same ratio, depending on the number of people for whom you are making the cake. Make sure you use a big mug that is microwavable because the batter might rise a bit while baking it and you don’t want the cake to ooze out of the mug. You can make this quick brownie for a low-key birthday, anniversary or even to make your loved one feel special. We haven’t use anything to garnish the cake, but you can definitely decorate it using chocolate syrup, chocolate ganache, chocolate chips, sprinkles, nuts, candied fruits etc. Do try this recipe, rate it and let us know how it turned out to be by leaving a comment in the section below.

How to make 5-Minute Mug Brownie

  • Step 1 Sift the dry ingredients

    Take a large microwavable mug. Through a sieve, sift the dry ingredients like all-purpose flour, powdered sugar, cocoa powder and baking powder.

  • Step 2 Mix in the wet ingredients

    Now add milk and vegetable oil to the cup. Use a fork or a spoon to give a good mix. Now dunk the chocolate pieces into the mug and cover them using the batter.

  • Step 3 Microwave it

    Now microwave the mug for about 3 minutes. Check by inserting a toothpick. If it comes out clean, your brownie is done. If not, then microwave for 1-2 minute more, as per the need.

  • Step 4 Garnish and serve

    Garnish with chocolate sauce (optional) and serve.

Chicken Barrah Recipe

One of the most popular dishes of Delhi, Chicken Barrah has a peculiar taste and can be easily prepared at home. It is a dish which requires a good amount of time for marination. You will be amazed to know that this chicken recipe tastes best when it is kept overnight after getting cooked in the fridge. This chicken recipe is a part of Mughlai cuisine and is great for special occasions and festivals. Best enjoyed with roomali roti, you can prepare this delicious dish in just 30-40 minutes once it is marinated. So, what are you waiting for? Try this amazing dish and enjoy with your loved ones!

For The Main Dish

How to make Chicken Barrah

  • Step 1 Prepare the chicken marinade

    To prepare this delicious chicken recipe, first prepare the marinade. For the same, roughly chop onions and fry them in a little oil. Once done, grind them to a fine paste and keep aside. Next, grind together fresh coriander leaves and green chillies to make a paste and keep it aside too. Then, grind the tomatoes to make a thick tomato paste. Take a small bowl and mix together cashews and almond paste. Your marinade ingredients are ready.

  • Step 2 Marinate chicken for 2 hours

    Wash and clean the chicken, then cut into pieces. Next, add all the marinade ingredients in it and rub well, keep in the fridge for 2 hours or more. (Note; Keeping chicken overnight will result in more taste.)

  • Step 3 Cook the marinated chicken in a pan

    When the chicken is marinated, put a pan over medium flame and heat oil in it. When the oil is hot enough, add the marinated chicken and cook for 2-5 minutes. Then, close the lid of the pan and cook the chicken until all the water is removed. Now, heat the rack and grill the chicken in it. Once done, keep aside until required.

  • Step 4 Prepare the gravy for Chicken Barrah

    Once the chicken is cooked, put a kadhai over medium flame and heat oil and butter in it. Let this butter-oil mixture heat for a few seconds. Once it is hot, add the ginger-garlic paste in it and saute for 2 minutes. Next, add tomato paste in the kadhai and the remaining paste of 2 onions. Mix well and cook the onion-tomato mixture for 2 to 3 minutes. Now, add all the masalas except kasoori methi and mix well. Cook for a minute and then add fresh cream along with cashew paste, mix well and cook for 3 minutes.

  • Step 5 Cook the chicken for another 5 minutes with kasoori methi

    Finally, add kasoori methi in it and mix well once again. Add water for some gravy as per your requirement and stir well. Cook the chicken in this gravy for about 5 minutes on low to medium heat.

  • Step 6 Add coal plate in the centre for a smoky flavour

    Finally, heat the coal side by side. Once it is hot enough, keep a bowl in the centre and add the heated coal in it. Add some oil or ghee over it and when the smoke is coming out, close the lid for 15 minutes. After that remove the bowl and close the lid. Your Chicken Barrah is ready, transfer in a large bowl and serve hot with roomali roti. (Note: If you want to make your Barrah tastier then keep it in the fridge for overnight.)

Prawn Pakora Recipe
Prawns are one of the most delicious seafood out there. These are also one of the most easily made dishes. There are so many recipes that you can cook with prawns and you will never get bored of them. This recipe for the Prawn Pakoda is a typical Indian recipe and that is why it has a lot of flavour and umami to it. It is made with simple and easily available ingredients in our kitchens and cooking them is just a matter of a few minutes. You can serve these delicious Pakoras with chai and some sweet and spicy chutney. Prepare this delicious snack recipe for

How to make Prawn Pakora

Step 1 Devein the prawns and marinate them

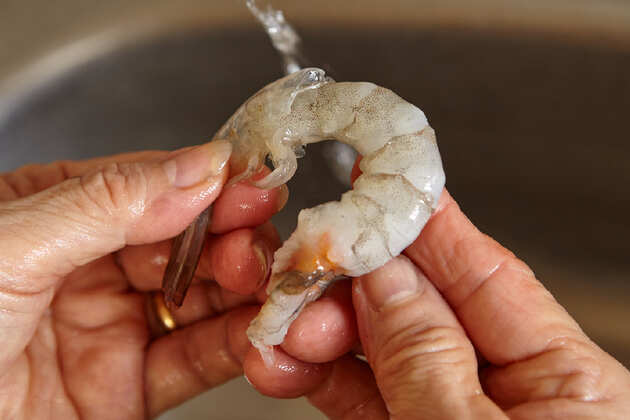
Start by deveining the prawns and then washing them nicely. Pat them dry and put them in a bowl. Add salt, red chilli powder and turmeric along with lemon juice. Let this mix marinade for 15 minutes.New Project (100)

  • Step 2 Coat the prawns, fry and serve!

    Add the rest of the ingredients into the bowl and mix it well. Add some water if you want the batter to be slightly thick. Meanwhile, heat some oil in a Kadhai and fry them one by one. Serve with a sweet and spicy chutney!

Cheese Rice Cutlet Recipe
Have leftover rice from lunch and don’t want to have them for dinner? Then try this super easy recipe and transform the basic rice into something tastier. You just need a handful of ingredients to make these yummy cutlets that can be paired with tomato ketchup, mint chutney and even mayonnaise. Be it kids or adults, everyone will love this dish for sure. You can serve these Cheese Rice Cutlets during kitty parties, birthdays or even a family gathering. To make the Cheese Rice Cutlets more nutritious, you can add grated carrot and even finely chopped capsicum. We have used cheese cubes here to fill the centre with cheese, but you can use any variety of your choice like mozzarella cheese, cheese slice etc. This recipe will come in handy when you don’t want to cook something heavy for dinner. To make the meal wholesome, you can serve tea, coffee or even a soft drink with these lip-smacking Cheese Rice Cutlets. Do try this recipe, rate it and let us know how it turned out to be by leaving a comment in the section being

How to make Cheese Rice Cutlet

  • Step 1 Saute the onions

    Heat 1 tbsp oil in a pan. Now add chopped onions to it and fry them for a minute. Now add garlic paste, give a mix and cook until the onions turn translucent in colour.

  • Step 2 Make the veggie mixture

    Now add boiled and mashed sweet corn to the pan. Also add red chilli powder, turmeric, coriander powder and salt as per taste. Mix and cook for a few minutes.

  • Step 3 Make tikki mixture

    Now take the leftover boiled rice in a bowl and mash them well. Add the veggies mixture to the bowl, along with 2 tbsp roasted sooji. Mix very well to make a thick mixture.

  • Step 4 Prepare the cutlets

    Now make small tikkis from the mixture, stuff a small piece of cheese in between and set them on a plate.

  • Step 5 Shallow fry them

    Heat 1 tbsp oil in a pan. Shallow fry the tikkis from both sides until golden brown in colour.

  • Step 6 Ready to be served

    Once cooked, your tikkis are ready to be served. Pair up with tomato ketchup and mint chutney. Enjoy!

Snickers Cheesecake Cups Recipe

Craving for a delish chocolaty treat? Then try this amazing Snicker Cheesecake Cups recipe, made with the goodness of peanut and caramel loaded Snickers chocolate, cream cheese brick, sour cream etc. Baked and frozen to perfection, this simple recipe is perfect for anytime hunger. This sweet satiating chocolate cheesecake can make for a yummy dessert post elaborate meals and is super easy to make and bake! So, without further ado, just follow us through this simple recipe and try at home.

How to make Snickers Cheesecake Cups

  • Step 1 Preheat the oven

    To begin with this easy recipe made with the goodness of Snickers chocolate, chop the Snickers chocolate and keep it aside. Preheat the oven to 325°F. Post that line 12 standard muffin cups with paper liners; place 1 cookie in the bottom of each muffin cup. Set aside.

  • Step 2 Whisk the cream cheese and sugar

    Next, using an electric mixer, beat cream cheese, sugar and salt until smooth and fluffy. Beat in the eggs andegg yolk until blended; beat in sour cream and vanilla.

  • Step 3 Add snickers

    Next, fold in half of the chopped Snickers and whisk it well with the creamy mixture. Take a spoon and add a spoonful of the mixture over the cookies.

  • Step 4 Bake the dish

    Bake for 20 to 25 minutes or until just set. Sprinkle tops with remaining chopped Snickers.

  • Step 5

    Once done, turn off the oven and allow it cool on the rack for 30 minutes. Next, refrigerate for at least 4 hours or until thoroughly chilled. You can also alternatively use vanilla wafer cookies in place of chocolate wafer cookies

Vegetable Oats Broth Recipe

Craving for a healthy and hearty dinner? Then try this super delicious and sumptuous Vegetable Oats Broth recipe, which can be made in just a few minutes with some simple kitchen ingredients. You just need some fresh veggies, mild spices, rolled/steel cut oats, cook them together and enjoy. This simple recipe can be tweaked as per taste and preferences. You can add some fresh coconut milk/cream to add an exotic touch to the dish.

How to make Vegetable Oats Broth

  • Step 1 Wash veggies

    To begin with this simple recipe, wash and chop the veggies. Wash and keep the oats aside.

  • Step 2 Toss veggies

    Take a pan and add in 1tbsp oil and toss ginger garlic paste, onions and veggies for 4-5 minutes.

  • Step 3 Add water and spices

    Add in water as required, spices and cook the veggies for some time.

  • Step 4 Season with spices

    Add in the oats, corinader leaves season with salt and pepper. Once the broth is ready enjoy it hot!

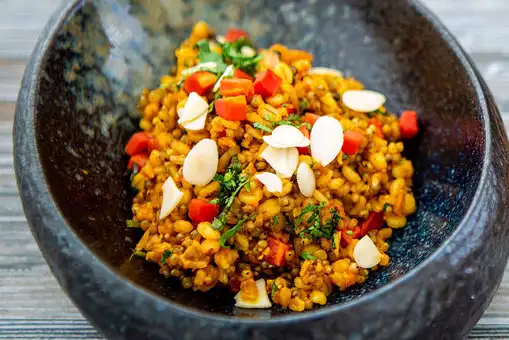
Almond Mix Grain Biryani Recipe
Someone has very rightly said that biryani is not just a dish, it’s an experience that you need to have once in a lifetime! With Almond Mix Grain Biryani, you will get a feeling that is unmatched by any other version of the dish. While the mention of biryani itself brings water in your mouth, this almond biryani recipe is nothing like the quintessential biryani you would have had. This unique dish is prepared by mixing brown rice, pearl millet and barley and is then cooked in several spices, vegetables and of course the goodness of almonds. Once all the ingredients are mixed properly, you will need to microwave this biryani and then it will be ready to be relished in a matter of minutes. Along with being new and different in taste, this simple biryani also carries several health benefits. Cooked with brown rice and added with almonds, this biryani recipe is not just delicious but healthy as well in all the senses. This dish is rich in healthy fats, proteins and fibres which helps in cholesterol control improves digestion and help prevent blood clot. Prepare this biryani at any event or party and amaze your guests with your culinary skills. Just follow this simple step-by-step procedure to prepare Almond Mix Grain Biryani and savour its taste with friends and family

How to make Almond Mix Grain Biryani

  • Step 1 Saute the spices with onions

    To prepare this one of a kind biryani recipe, heat ghee in a pan over medium flame. One the ghee is hot enough add in cumin seeds with bay leaves, chopped green chillies, sliced onions, chopped ginger and chopped garlic, Saute for about a minute until softened.

  • Step 2 Add in the carrots and all the grains

    Now, raise the flame to medium-high and add in diced carrots and cook well for about 5 minutes until carrots are softened. Once the carrots properly cook add washed barley, washed brown rice and washed pearl millet. Cook for 10-12 minutes.

  • Step 3 Add almonds and bake

    Next, add in the vegetable stock and bring the mix to boil. Once done, add the almonds in it. Mix all the ingredients well and cover the pot. Now, put it in the oven and bake for 30 to 40 minutes at 180 degrees Celcius.

  • Step 4 Garnish the biryani and serve hot

    Once the biryani is completely cooked, add in chopped coriander leaves, chopped spring onions and season with salt and pepper. Serve hot.

Chicken Masala Fry Recipe
Chicken Masala Fry is a lip-smacking dish that you can serve as a snack, appetizer or as a main dish. The chicken is coated in a melange of spices like red chilli powder, coriander powder and garam masala. This dish is prepared in a pan by shallow frying the chicken along with the spices. Chicken Masala Fry can be an amazing addition to your kitty party or brunch menu. It’s rich in protein and will satiate your hunger cravings. You need to try this delectable Chicken Masala Fry which is full of Indian flavours. If you are a chicken lover, then this super-easy snack will become your ultimate favourite. Make sure you add curry leaves and dry red chillies in the tadka to give the dish its signature taste and aroma. You can serve Chicken Masala Fry as a snack alongside tomato ketchup, mint chutney or any other dip of your choice. If you wish to serve it as a side dish or main dish, pair it up with roomali roti and raita for the best combo. Be it kids or adults, everyone is surely going to enjoy it. Do try this recipe, rate it and let us know how it turned out to be by leaving a comment in the section below.

How to make Chicken Masala Fry

  • Step 1 Fry onions and chilies

    Heat oil in a pan and then add dry red chilli, green chillies, curry leaves and onions to it. Fry them until they turn golden in colour. Next, add ginger and garlic paste and fry till the mixture gets golden-brown in colour.

  • Step 2 Add the chicken pieces

    Now, add the chicken pieces to the mixture and fry the chicken till it loses all the moisture.

  • Step 3 Cook the masala

    Now, add coriander powder, red chilli powder, garam masala, and salt to the pan. Sprinkle 4 tbsps of water. Cook it for about 15 mins.

  • Step 4 Your Chicken Masala Fry is ready

    Your dish is now ready to be served. Serve it with some chutney as a snack or as a main dish with some roomali roti. Enjoy!

Paneer Fried Rice Recipe

Yearning for a sumptuous and quick meal? Then we have got your back! Here’s a delicious and easy-to-make Paneer Fried rice, which can be made at home with some super simple ingredients. In fact, this recipe is so easy that you can actually reuse leftover rice and cottage cheese block, add a choice of veggies and you are sorted with a wholesome and healthy meal. Loaded with the goodness of protein, fiber and essential nutrients, this dish has it all! You can pack this dish for office and school lunch or else you can serve it as a dinner for busy weekdays. So, try it today and nail this easy and delicious recipe.

How to make Paneer Fried Rice

  • Step 1 Wash and chop

    To begin with this easy recipe, wash and chop the veggies. Cut the panner pieces.

  • Step 2 Add onion and garlic

    Take a pan and add oil, once the oil is hot enough. Add onions and garlic cloves. Saute for 2 minutes.

  • Step 3 Increase the flame

    Increase the flame and add tomatoes and cabbage, once the veggies are wok tossed and slightly golden brown. Add the soy sauce and the spices.

  • Step 4 Toss the rice

    Lastly, add boiled leftover rice and paneer, cook for 5 minutes at high flame. Season with salt and add corinader leaves. Serve hot and enjoy